These are directions saved from a previous version of the DK Percussion website. If you enjoy or have questions, please leave a comment!
Cartwheel wraps are a very popular wrap style and use much less felt than ball or parachute wrapped mallets. There are many variations on how this can be done, so experiment and come up with the way that works best for you! This is the way DK Percussion does it…
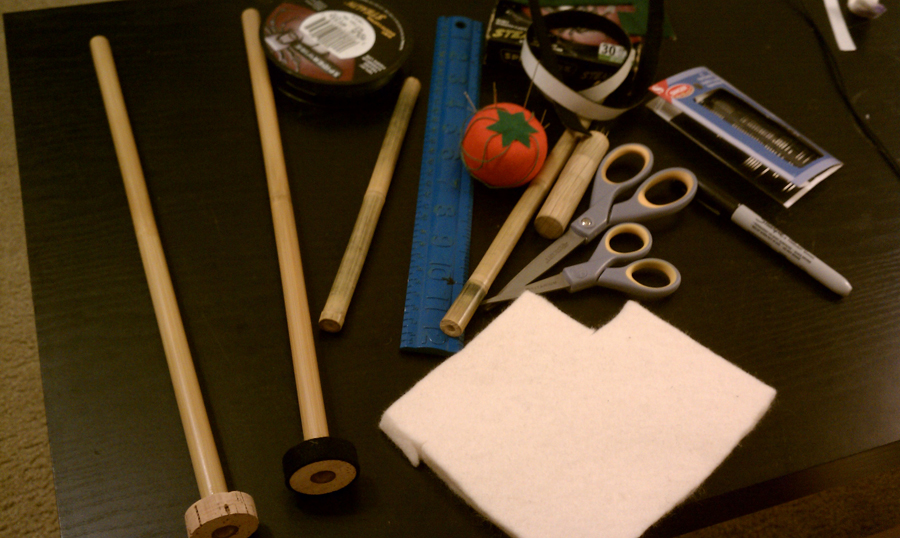
Materials and tools needed:
Felt (this style works well with any type or thickness.) String to tie the felt (Rec: Spiderwire, 30lbs-test, 8lbs-dia) Adhesive felt (optional) Permanent marker Sewing needle Ruler Scissors Drumsticks, dowels, or something to aid in pulling thread tight
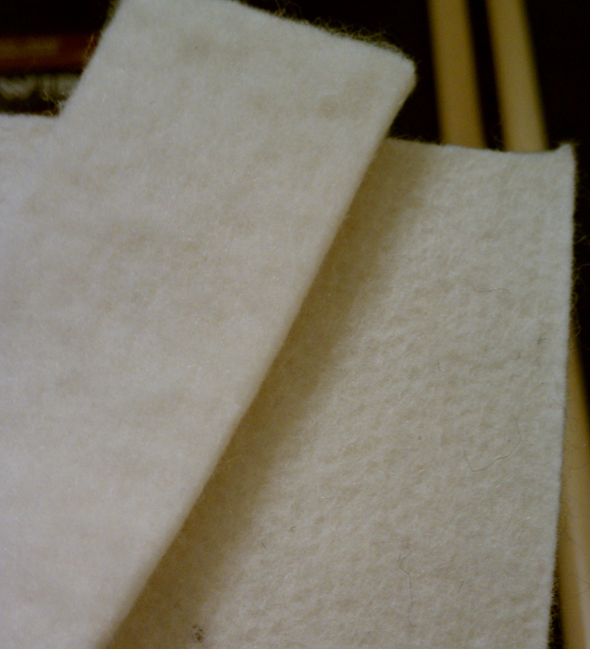
1. After cutting out twice as much felt as you’ll need, determine which side of your felt is which. If it hasn’t been split yet, both sides are “hard.” The fuzzier side is the “soft” side. Note in this picture the fuzzy versus hard side of the American felt being used.
2. Split the felt to desired thickness by starting in one corner and using your thumbs to grasp the widths you’d like. (German and American felt sometimes have noticeable lines in the layers.) When splitting, be sure not to cross layers.
3. Clean up the soft side by removing any cross-layers by grasping and pulling with your thumb and first finger. Then smooth the soft side out on a flat surface such as a table. At this point, you should decide if you want the hard or soft side out on your mallet. Hard side out is more articulate. Mark the OTHER side with a marker to avoid confusion later.
4. (If you plan to use adhesive felt under your wrapping felt, put it on prior to measuring out your felt length.) To determine the length of felt needed, begin by wrapping the felt around the core of the mallet. It should fit snug, so mark the felt right where the two ends meet.
5. To determine the width of your felt, squeeze it around the core. Generally, around twice the width of the core is sufficient. If you want a rounded cartwheel wrap, cut slightly more.
6. Mark your felt on the inside side (soft for hard side out, etc) for two identical pieces. Use the ruler to aid in marking the felt straight. (Note the darker dots used to measure and line up the ruler.) Cut out your felt with sharp scissors. This ½”x1″ core ended up getting 1” wide felt, and slightly under 3 ½” long.
7. Double check that the felt’s length is correct – there should be a small gap between the ends. Next, cut the thread to tie a seam – about a 12-15” cut should be enough. (Note: if your felt is thick, you can trim a 45-degree angle off the edges on the INSIDE side where the needle will pass through.)
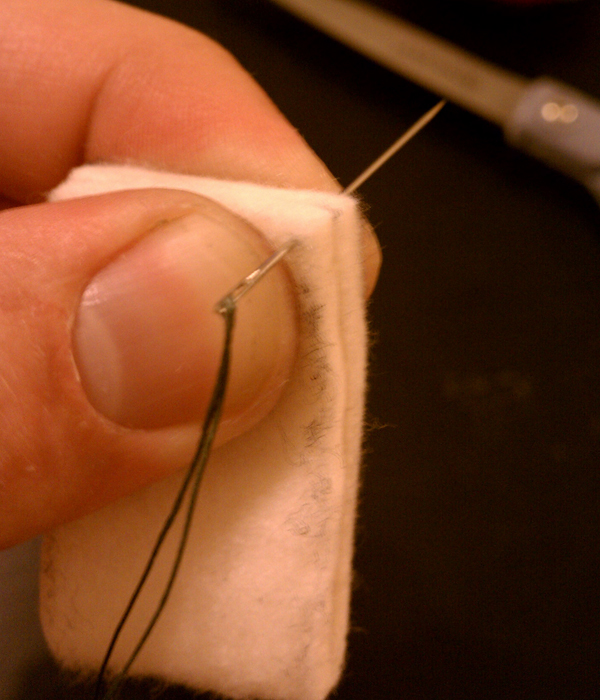
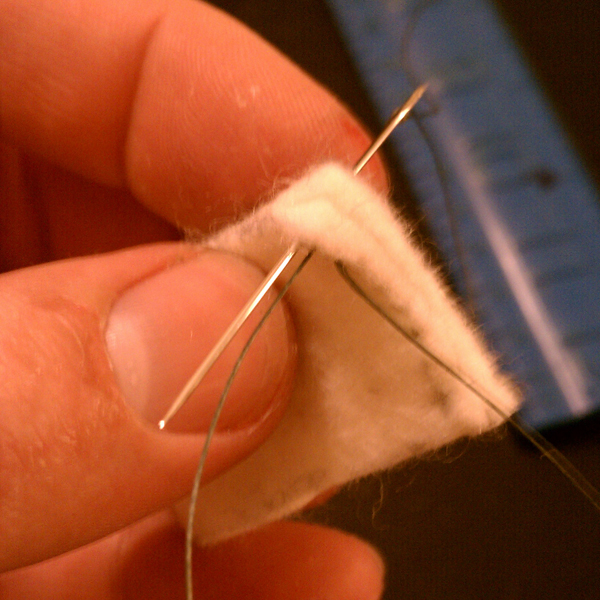
8. Fold the length of felt so the two end pieces meet and so that the playing surface is on the INSIDE of the loop. Thread your sewing needle so that the needle is about 3” down the thread and fold it (but do not tie it). Insert the needle into one side of the loop about 1/8” near the corner and pull through the felt, leaving about 3” of thread to create your first seam knot.
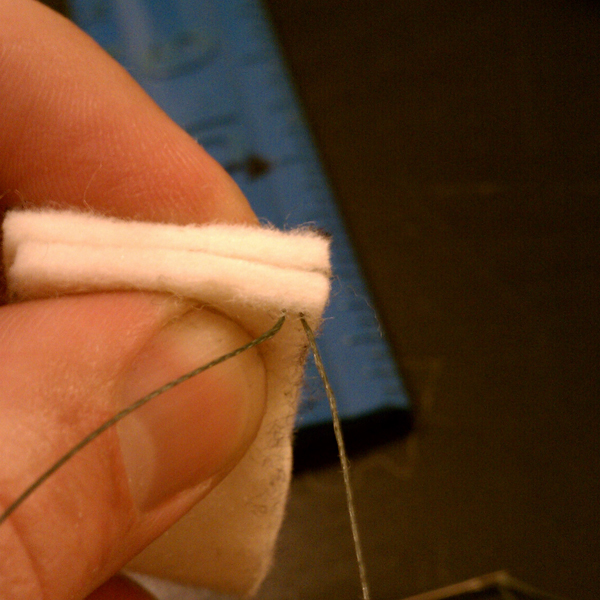
9. Double the needle back through the felt about 1/8” below the seam and next to the first bit of thread. You should now have an upside-down “U” shape of thread in your felt. Double knot this bit of thread with the two ends. Be sure to pull tight. Carefully cut off the excess (short) piece of thread.
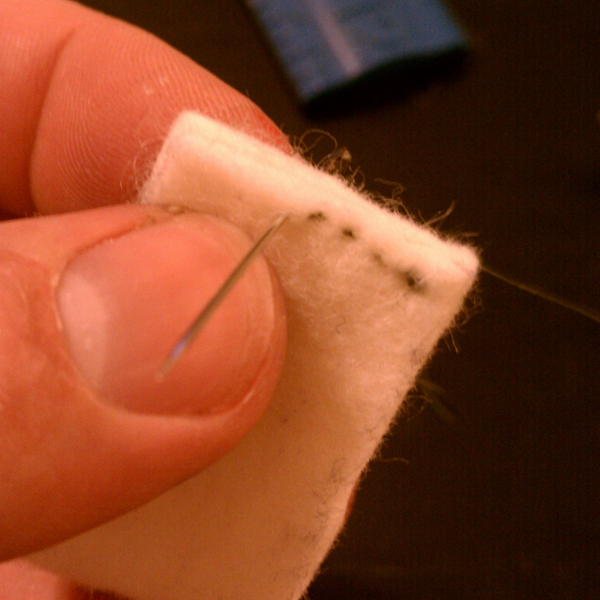
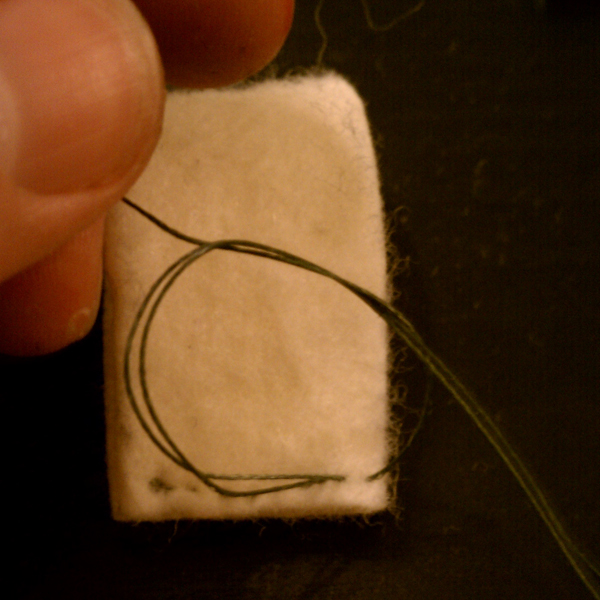
10. Begin going back and forth with the needle and thread, pulling tight with each pass.
11. Each stitch should be equally spaced apart.
12. Before you get all the way to the end, leave enough space for two more passes of the needle. On the second to last pass, leave some excess thread (about 3” when the loop is folded). Pass the needle through one more time and remove the needle from the thread.
13. Use the loop of thread and single strand to create another double knot. Pull this tight. Cut off the remaining thread – your seam is done! Now repeat the same process from step 7 for the other piece of felt.
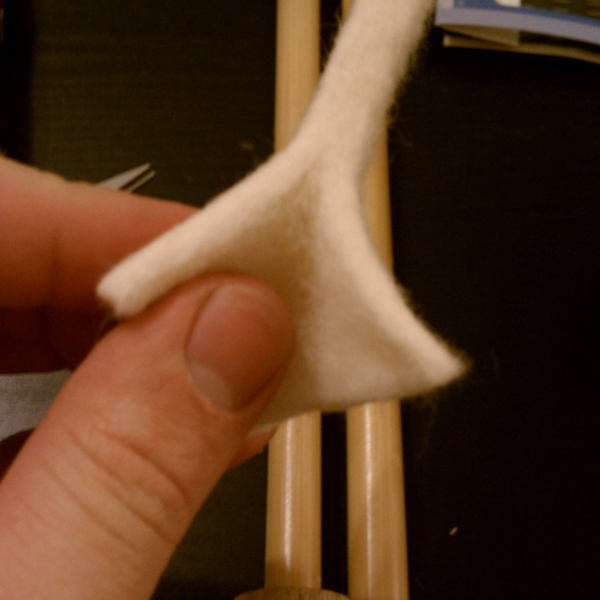
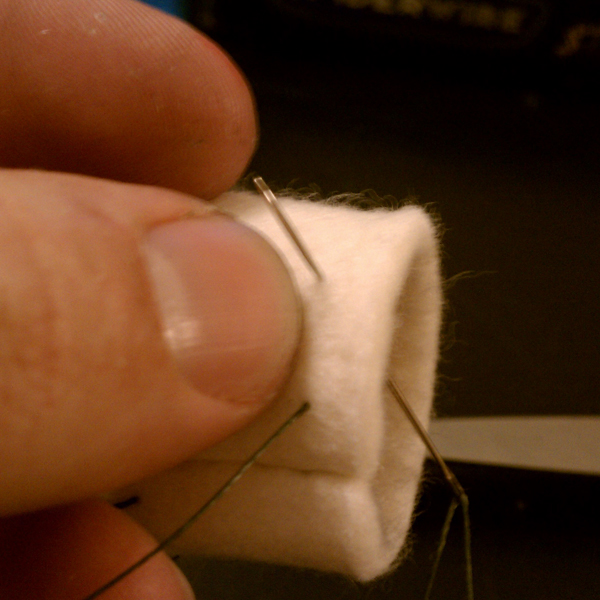
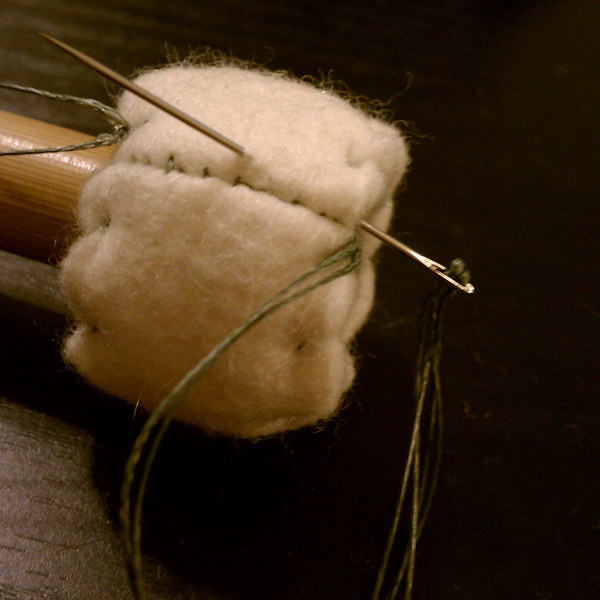
14. Squeeze the seam between your first finger and thumb, and turn the loop inside-out. You should now have a circle with the playing surface on the outside. Thread your needle with 15-18″ of thread in the same fashion as before, and decide how far apart you want your stitches. Insert the needle at a forward angle half the distance of your stitch size from the seam. (For a more rounded top wrap, stitch closer together and closer to the top. Larger stitches make pulling the felt tighter easier.)
15. Begin making stitches, carefully spacing them out. (Tip: it helps to guide the needle with the finger that is inside the loop of felt.) Make the needle enter the felt at a slightly downward and forward angle.
16. Make sure your stitches are evenly spaced and at the same distance from the top all the way around.
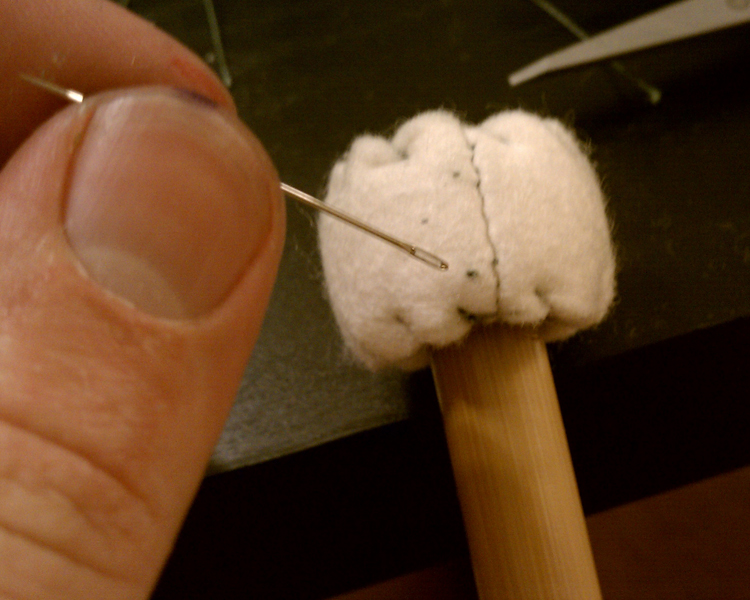
17. Make sure your last stitch is evenly spaced with the seam and other stitches. (Tip: make the last two stitches line up with the first stitch, to create 3 evenly spaced stitches.)
18. Repeat this process from step 14 until you have both felt loops stitched on both top and bottom.
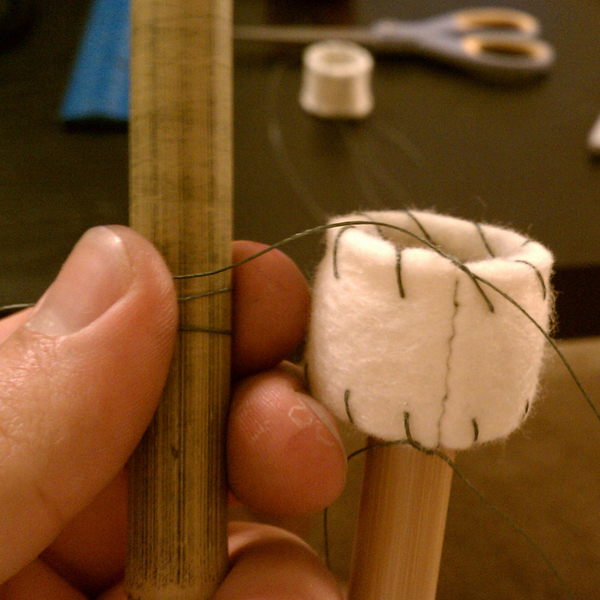
19. Fit the felt loop onto the core. (Make sure if you haven’t yet applied adhesive felt and want to, do so now. This includes a “crown,” or coloring in the top of the core.) Make a single knot loop and keep the thread going in the correct direction to essentially create another stitch.
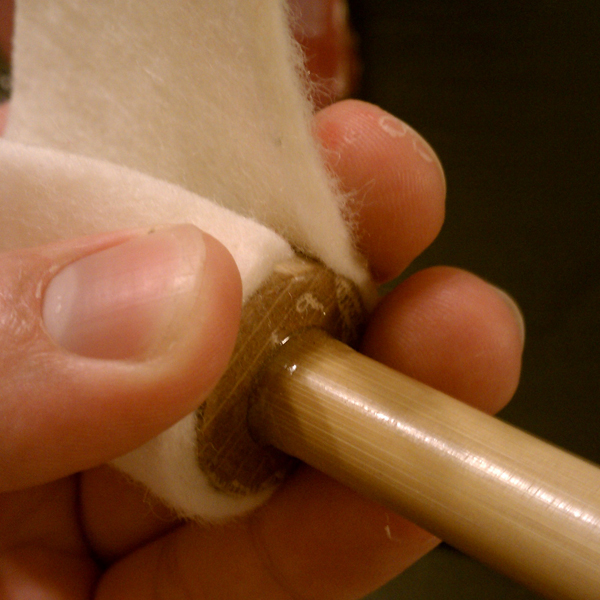
20. Wrap the pieces of thread around two dowels, drumsticks, pens (anything not your fingers!), and begin to pull tight on top and bottom. It doesn’t matter which one is first.
21. The single knot will not hold the felt tight, so after initially pulling tight, double knot and pull tighter (if using PTFE thread. If not, have a helper hold the single knot when the felt is taut enough.) If using PTFE thread (braided fishing line), you can pull the double knot tight.
22. Once everything is pulled as tight as you’d like it, double knot the thread again, creating a quad-knot. DO NOT CUT THE THREAD YET! Instead, line the thread up together, and cut it together at about 6” away from the mallet.
23. Thread the needle with both pieces of thread. (If the needle eye isn’t big enough, you can repeat this step with a single piece of thread.) Insert the needle into the inside of the felt as far down as you can, going towards the center of the seam. Once the needle is through, pull the thread tight.
24. Take your scissors and use them to press into the felt around the thread, while pulling the thread taut with the other hand. Snip the thread off. If some sticks out, use the back end of your needle to push it back into the felt. Repeat from step 19 for the other mallet.
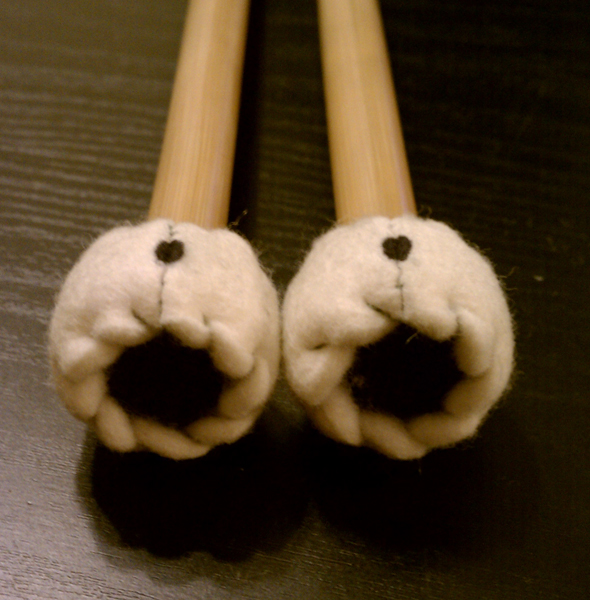
25. Your mallets are almost done! Mark the seam with a permanent marker and do any voicing needed to make the mallets either match or have the proper articulation. Then you’re done!
Please feel free to use and or print these directions, but please make sure to leave a link back to here!


Leave a Reply